Category Labels Block allows you to display categories or taxonomies associated with a post. In this guide, you’ll learn how to use this plugin to enhance your posts with dynamic category labels.
Step 1: Install and Activate the Plugin
- Download the plugin’s ZIP file.
- Go to your WordPress dashboard, navigate to Plugins > Add New.
- Click Upload Plugin and select the ZIP file.
- Click Install Now and then Activate.
Step 2: Add the Category Labels Block
- Go to Posts > Add New or edit an existing post.
- Click the + button and search for Category Labels Block.
- Add the block to your post.
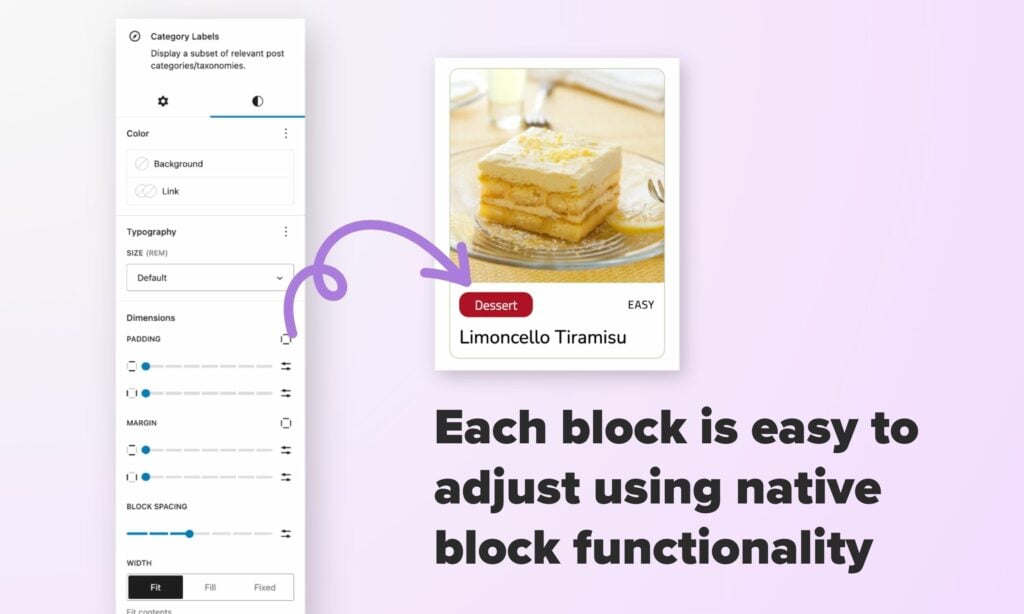
Step 3: Customize the Display
- Use the block settings to choose which categories or taxonomies to display.
- Adjust the appearance and order of the labels as needed.
Step 4: Preview and Publish
- Preview the post to see how the category labels look.
- Click Publish to make the post live.
Tips:
- Use this block to help users easily navigate through related content.
- Customize the labels to match your site’s design and branding.
Conclusion
Category Labels Block is a great tool for enhancing your posts with dynamic category labels. By following this guide, you can effectively use the plugin to improve your site’s content organization.
Features
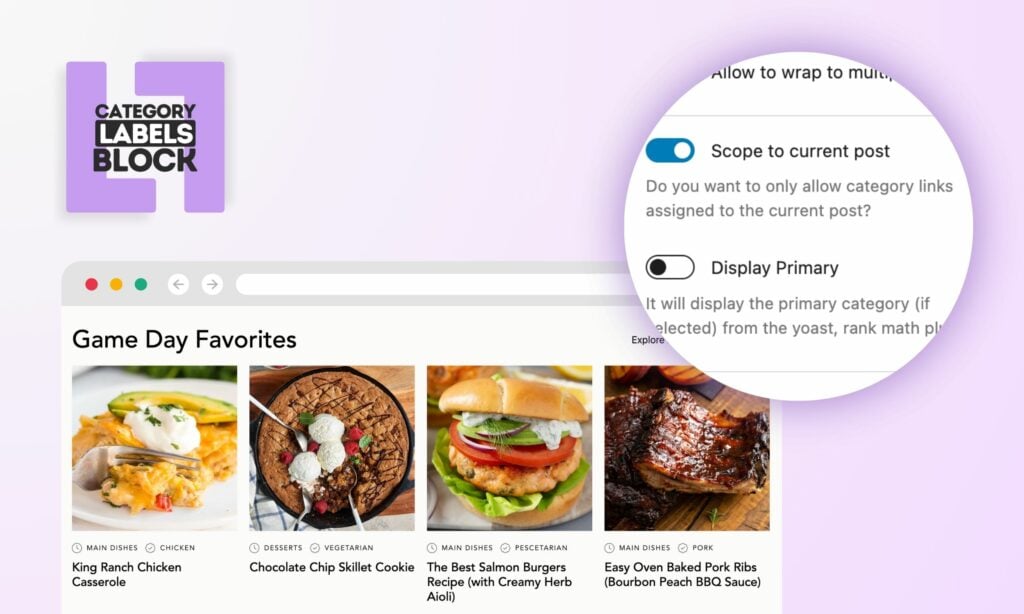
- Scope to current post: A control that allows you to only display categories related to your current WordPress post.
- SEO Plugins Support: This plugin supports displaying the primary post category via “Yoast” and “Rank Math” SEO plugin.
- Taxonomy Support (PRO): Ability to display custom post taxonomies.
- Limit Categories/Taxonomies (PRO): Ability to limit the total number of categories to display.
Usage
- Add the “Category Labels” block to start grouping categories or taxonomies.
- Inside the “Category Labels” block, add a “Post Term” block to select specific categories or taxonomies.
- Use the “Term Name” and “Term Abbreviation” blocks to display the category name and abbreviation, respectively.
- Adjust visibility and limits using the block’s control settings in the sidebar.
Note: The free version allows selection of post categories only. Premium version includes additional features like custom taxonomy selection and limit controls.
Frequently Asked Questions
Q: Can I use this with any theme?
A: Yes, Category Labels Block works with any theme that supports Gutenberg blocks.
Q: Is there a limit to the number of categories I can display?
A: In the free version, you can display all categories related to the post. The premium version offers controls to limit the number of categories.
Screenshots


Leave a Reply